Roofing
Why Good Roofs Die Young
When tenants call to complain that the roof is leaking all over their expensive office equipment, it’s too late to wonder if the problem was preventable.
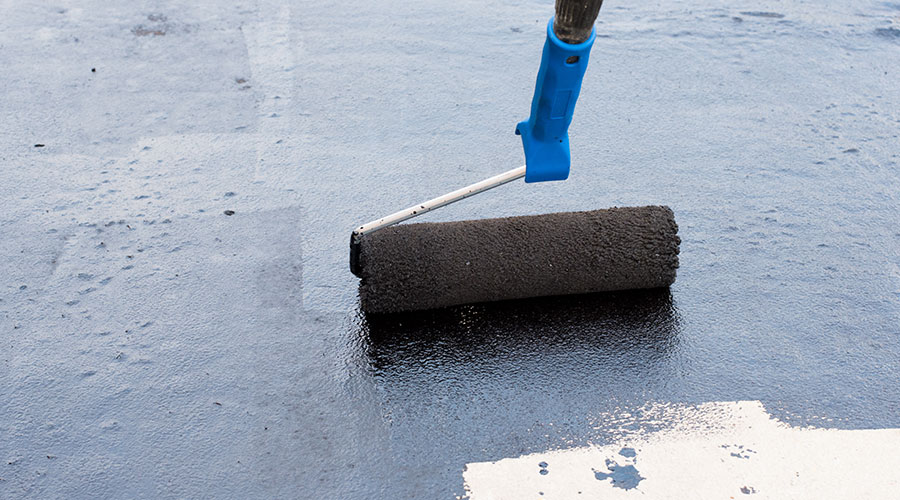
Whether the building has been around for a while or has just opened its doors, inadequate seam sealing is the most common reason roofing systems fail.
Improperly sealed laps lead to seams that don’t stick, or soft seams — seams that appeared to stick, but didn’t, says Karen Warseck, president of Building Diagnostics Associates. The result is an opening in the seam that can allow water to flow down into the roofing system.
“Not doing the seams properly is going to be fatal,” she says. “There’s going to be a leak. End of story.”
Another common error is installing a second roof over an existing roof without examining the moisture conditions underneath. Installing a roofing system over a wet deck or existing roof can hide structural damage and ultimately cause the roof to collapse, says Scott Dolan, consultant with Wiss, Janney, Elstner Associates.
Combining incompatible materials can be equally damaging, says Joe Shuffleton, president of Engineering and Technical Consultants. For example, asphalt is not compatible with cold tar or certain types of single-ply materials. The problems that result are likely to cost twice as much to repair as the original problem.
Sometimes, roofing troubles begin before the building is even finished. For example, designers occasionally include details and corners that can’t be flashed.
To avoid design problems, experts recommend working with a consultant experienced in all facets of commercial roofing. “Even the best contractors may not be able to address all issues, such as code requirements, sources of moisture not related to the roof, masonry and sealants,” Dolan says. A consultant can help ensure that project documents address all conditions and that work is done in accordance with those documents.
If hiring a consultant isn’t an option, facility executives should try to stay on site during the installation. This can cut down on costly shortcuts. “Installers are more conscientious when someone’s watching,” Warseck says. “There are a lot of things that go into roofs that are hidden. If nobody’s watching, you never know if anything has been done wrong.”
Designers and installers aren’t the only ones to blame for leaky roofs. Manufacturers address only the most common roofing details in their standard systems, leaving facility executives to work with consultants or the contractor to customize details, Dolan says.
And there are cases where the material simply fails, says John D’Annunzio, president of Paragon Roofing Technology. “If the roof system is correctly installed, failure usually is from a material that doesn’t meet the needs of the building.”
When the installation is completed correctly, yet the roof still leaks, Mother Nature or man-made carelessness are often to blame. Debris tossed about in a storm, heavy foot traffic and installation of new rooftop equipment can poke holes in even the best roofing installations.
“Every time you cut into the roofing system, you create a weak spot,” Shuffleton says. “That’s just common sense. If you have a big sheet of material with no seams, you can keep it water tight. Penetrations, that’s where the leaks come from. And anytime you have a severe storm, you need to check and see if any debris damaged the material.”
After the Rain
If the roof does leak, the first thing to do is to find and stop the leak.
Penetrations and flashings are the first places to look, D’Annunzio says. Next, examine angles where horizontal surfaces meet vertical surfaces, and then search for holes and splits in the membrane and roof surface. “Most of the time, it’s easy to identify,” he says. Exposed deck and puddles also point the way to leaks.
On occasion, further exploration is required because not all leaks are necessarily roof leaks, D’Annunzio says. HVAC systems that overflow into walls and cracks in the building exterior or window seals can cause ceiling leaks.
Once the leak is found, it must be fixed as soon as possible. “Water in the roofing system can travel, and it could damage the membrane. You want to correct it as soon as possible so it doesn’t do more damage to the roof or structural components,” D’Annunzio says.
Make sure to have appropriate materials on hand for an emergency patch. The material must be compatible with the roof type. Once the leak is stopped, thoroughly dry the area and disinfect it to prevent mold and mildew.
If the roof is under warranty, call the warranty provider within 24 hours. “All manufacturers that issue warranties understand that if you have a leak in the middle of a rainstorm, you’ve got to do what you can to stop it,” Shuffleton says. But manufacturers usually want a preauthorized contractor to install a long-term patch.
Finally, document the leak to determine whether a pattern exists and if there might be a more critical problem. If there are frequent leaks, the roofing system may be in trouble. “If you’re getting multiple leaks, it’s dead,” Warseck says. “It needs to be replaced.”
It doesn’t take an expert eye to spot a dead roof, she says. The signs are obvious. If the roof is at least 10 years old, it may well be getting close to needing a replacement. How close depends on the state of deterioration.
For example, when it’s time to replace EPDM synthetic rubber roof membranes, the material turns powdery and the seams start to fail. When the fastener heads are visible on a single-ply roofing system, “you know it’s probably on its way out,” Warseck says.
If the insulation is compressed or waterlogged or if it has dropped, the roof will need replacing soon. If the roof is inordinately taut, that means it has shrunk and will probably fail soon. When the stones on gravel roofs become dislodged and the felts are exposed, again, the roof is nearing the end of its life.
Worst of all, if the roof is cracked or brittle, “it’s really on its way out, Warseck says. “It has no life whatsoever.”
An Ounce of Prevention
Preventive maintenance is the best way to extend the life of a roof — and to avoid occupant complaints.
“You need to treat the roof like any piece of equipment,” Warseck says.
Experts recommend routine maintenance every six months, in the spring and in the fall. Clean drains to prevent water from pooling. Walk the roof and notice where gravel is displaced or rubber is chalky. Repair minor problems immediately, before they become major problems.
“Anybody with common sense can look at the roof to see what’s going to happen,” Warseck says. “Call someone right away while the problems are still minor. This will help avoid leaks and help the roof last longer.”
Well-maintained systems can last beyond the warranty period. “Proper maintenance is required in warranties,” D’Annunzio says. “And it lowers the annual cost if you extend service life five to seven years. That has a payback, because it’s deferring the capital outlay.”
Stay on Top of Things
Proactive measures also may include a roof condition assessment.
A roof condition assessment is a thorough inspection that should be done about every five years to determine whether the roof shows signs of imminent failure or premature wear. These assessments should be conducted in conjunction with semi-annual maintenance inspections, not in place of them, say the experts.
During a roof condition assessment, inspectors search for problems with joints and seals. They examine penetrations and places where the membrane is cut or joined to another system.
Some indicators of trouble can be subtle. For example, signs such as stained ceiling tiles or chalky residue on the brick near the roof level can indicate the roof is leaking. If the roof feels spongy when walked on, wet insulation board may be the problem.
More sophisticated studies include infrared monitoring, which measures the amount of heat passing through the insulation beneath the roof. If the insulation releases heat during the cooler evening hours, there is likely wetness below the roof.
All of this information can be fed into a software program, which charts out a maintenance, repair and replacement plan that can be used for long-term planning.
Know Your Warranty
With everything that could go wrong with a roof, what kind of warranty should facility executives look for? The answer is, “It depends.” Some warranties offer substantial benefit while others are relatively worthless.
There are three types of warranties. The most basic warranty covers materials, but not the labor to remove, replace or repair the damaged product.
A standard warranty covers labor and material. This type of long-term warranty usually represents a one-time cost of about 16 to 17 cents per square foot. In this case, installers must usually be prequalified by the manufacturer. Using an outside installer could void the warranty.
An extended 20-year warranty places no dollar amount on repair or replacement costs. In some cases, it might even cover damage caused by leaks.
While it might be tempting to forego the warranty, particularly if you have to pay for it, D’Annunzio says that without a warranty, the building owner is protected only under applicable state laws governing product performance.
With that in mind, experts advise that some protection is better than no protection. Coverage is determined by how much can be spent.
Shuffleton recommends sticking with major manufacturers. Their standard warranties are fairly comprehensive, and these companies are usually backed by assets, so there is some assurance they will be able to stand behind the warranty.
However, all warranties come with an important caveat: They rarely favor the customer.
“It should be understood that all roof manufacturer warranties are designed to protect the manufacturer,” D’Annunzio says. “The limitations are not favorable to building owners. Most major roof warranties have 13 to 15 limitations.”
Limitations usually exclude damage caused by excessive foot traffic, other trades, such as HVAC technicians and acts of nature.
For example, warranties that don’t cover damage from winds stronger than gale force are useless in places like Florida, where a routine thunderstorm can pack that much punch.
“In that case, the warranty doesn’t cover anything. It’s basically useless,” Warseck says. “The way warranties are written, if a roofing manufacturer wants out, they can get out.”
If the damage is weather-related, for example, the manufacturer might do a quick repair then say it’s not a warranty claim, Dolan says. It is important to act promptly if a roof is damaged. “If the repair if done on a timely basis, then the warranty will remain intact,” says Dolan. “If it’s not repaired properly, then that voids the warranty.”
Warranties also are a measure of the roofing manufacturer’s responsiveness.
“Some will stand behind it,” says Warseck. “Others avoid it. It’s just a function of reputation for the manufacturer.”
Facility executives and building owners also must do their part.
“Building owners must hold up their end of the agreement with maintenance to make sure the roof is free of debris and the drains are unclogged,” Dolan says. “They must notify the manufacturer of new roof equipment and make sure they keep on top of the other limitations expressed in the warranty.”
Lynn Proctor Windle, a contributing editor for Building Operating Management, is a freelance writer who has written extensively about real estate.
Understanding Air Barriers and Vapor Retarders
The use of air barriers in combination with vapor barriers is not a new practice. A properly designed and installed air/vapor barrier system offers many benefits: greater comfort, fewer maintenance requirements and reduced energy bills.
Nevertheless, concern about energy conservation and increasing mold-related issues have driven facility executives and design professionals to look at vapor retarders more closely. In particular, a distinction has been made between air barriers and vapor retarders. Several states, including Massachusetts, Illinois, New York and California, have recently updated building codes to include sections dedicated specifically to air barriers in the building envelope. Other states focusing on energy efficiency, such as Florida and Connecticut, are anticipated to update codes that require air barriers in conjunction with vapor retarders in the building envelope.
On its own, a vapor retarder restricts movement of water vapor through the building envelope by diffusion. Typically, water vapor travels between different zones of air vapor pressure, such as the interior and exterior of a building. The vapor retarder prevents moisture from entering cold portions of the envelope, thereby reducing the potential for condensation, which can cause building deterioration and mold growth.
The air barrier is a continuous system to stop mass airflow into and out of the exterior wall or roof assembly. Airflow through buildings brings excessive amounts of water vapor into the envelope, much more than by diffusion alone. A leaky air barrier can increase water penetration, decrease energy efficiency and damage building components.
Although some materials act as both air barrier and vapor retarder, the materials should be considered as individual components.
Selection and placement are critical. No one material will function as an air/vapor barrier for the entire building. Selection of materials and correct placement of the air/vapor barrier is critical. Joints between materials, as well as envelope assembly components, such as windows, doors and corners, must also be sealed, as this is where the majority of air leakage occurs.
Air/vapor barrier materials are distinguished by their permeability. Materials can be vapor- or air-impermeable by code definition.
Examples of combined air/vapor barrier materials include modified asphalt membranes with polyethylene facing, liquid-applied air barriers, sheet metal and polyethylene. Although a material like polyethylene is both air- and vapor-impermeable, it is generally used only as a vapor retarder. Examples of commonly used air barriers that are vapor-permeable include gypsum sheathing (base standard), vapor-permeable liquid-applied air barrier membranes, and insulation (polystyrene, spray urethane, polyisocyanurate).
Joint transition materials often function as both air and vapor barriers by providing a connection between main components. The joints are often dynamic and the seal must be flexible. Examples of both flexible and rigid transition materials are: urethane or silicone caulking, modified asphalt membrane strips, backer rod, joint fillers combined with spray methane foam insulation and sheet metal.
Although air/vapor barriers are intended to improve envelope performance, improper design and installation can result in water or air infiltration, condensation problems, mold growth, building deterioration and poor indoor air quality. Careful selection and placement of the air/vapor barrier materials creates an efficient system.
Architects, engineers, owners and construction managers, if applicable, must work cohesively in the early stages of design to fully develop the air/vapor barrier concept and transition detailing. Prior to and during construction, owners, architects, inspectors and construction personnel can increase the probability of a proper installation by holding preconstruction conferences, setting up inspection standards and procedures, performing frequent quality control checks, and enforcing a stringent material submittal and mock-up process. The project team’s focus during these stages will help achieve an air/vapor barrier that will be continuous, durable and within locally set air and vapor permeability standards.
—Marc A. Loranger is a project engineer for Gale Associates Inc., a design and consulting engineering firm that specializes in evaluation, design and repair of the building envelope.
|
Related Topics: