Getting More From the Floor
Floor coatings and proper maintenance combine to help concrete, resilient flooring and wood retain their appearance
Most institutional and commercial facilities feature a range of hard-surface floor coverings, from wood and resilient flooring to concrete. Ensuring these materials retain their initial appearance can go a long way toward enhancing the image of the facility and protecting the safety of occupants and visitors.
Maintenance managers must address a number of issues before deciding on the best coatings for floors. These issues encompass not only the type of flooring to be coated but also its condition and service considerations, such as heat exposure, chemical presence, moisture and abrasion.
Manufacturers of hard-surface floor coatings have prepared material safety data sheets (MSDS) for each product. A careful review of substrate material conditions, service conditions and MSDS information will help managers achieve optimum floor appearance, durability, service and safety.
Managers also can benefit from using application and cleaning strategies designed to ensure performance and protect the investment in these products.
Concrete Considerations
Concrete coatings include curing compounds, sealers, color coatings and treatments. Workers should examine application conditions carefully because many variations affect coating selection.
Typical considerations for concrete coatings include: Is the application outside or inside? Is the concrete porous, tightly troweled or exposed aggregate? Is the surface horizontal or vertical? Does the application require resistance to slips, oil, grease, acid, ultraviolet radiation, or de-icing salt?
For new concrete, a 30-day curing period with a curing coating will help the concrete develop full strength. When it is dry, workers can sweep, pressure wash — using a 2,000-psi unit with a fan tip — or scrub the surface with a rotary walk-behind scrubber and detergent, and rinse twice.
Acid washing using one part muriatic with five parts water might help remove oil and stains or improve the appearance of exposed aggregate. Workers can neutralize the acid wash with a rinse mixture of 1 pound of baking soda to 5 gallons of water. They’ll need to rinse twice or until the rinse water is clean, removing the rinse water with a squeegee or wet vacuum to prevent efflorescence.
For sealing, crews can use an airless sprayer, roller, or lambs-wool applicator. The sealer application rate for one sealer product using lambs wool is 800-1,000 square feet per gallon, or 1,000-1,600 square feet per gallon for subsequent or maintenance coats.
Crews might need to apply two coats on previously untreated concrete, applying the second coat when the first is tack-free — after about 2 to 24 hours, depending on heat and humidity. The best conditions for this work are dry, windless air at 50-90 degrees. Complete drying takes 12-24 hours.
Maintenance of concrete floors includes keeping them clean and free from dust and grit. Applying an emulsion-type commercial floor finish improves wear and slip resistance. If buildup or spot damage prompts resealing, crews first should treat the spots by cleaning stripping and resealing, feathering the sealer to the old seal.
Then, they can clean the floor and reseal as in the first coat. If resealing is required after a finishing coat has been applied, they’ll need to strip off all the finishing coat first.
Resilient Flooring
Common types of resilient flooring include vinyl composition, vinyl, linoleum, rubber and cork, which are available as both tile and sheet products. Their appearance and durability start with good installation techniques.
Installers should keep flooring and adhesives at normal room temperature and humidity for 48 hours before installing, and they should ensure surfaces and underlayments are moisture-free. Good ventilation using exhaust fans is important at the point of application to maintain low levels of volatile organic compounds. Workers should not install flooring directly over asphalt tile, self-stick tile, old carpet, tile adhesive, embossed or planked surfaces, radiant heated floors, or linoleum.
Workers should not sand or scrape old tile because the material might contain asbestos or silica. If the tile’s content isn’t certain, assume it does contain these materials. Surface preparation starts with removing all dirt, dust, wax and dressings. Workers also will need to remove molding, check door clearances, and perform bond tests.
Crews should apply homogeneous resilient flooring within four hours after cutting to fit. When seaming two sections, they should lay the cut pieces on top of each other with some overlap, then scribe the seam edge of the lower piece, and cut it square. The next step is to fold back the sheets, apply a 3-6-inch strip of seam adhesive along the surface where the seam will be, apply field adhesive with a notched trowel over the rest of the exposed area, and allow the recommended setting time. Then they can lay the first sheet and use a 100-pound roller along the seam edge.
Next, they can scribe the top sheet with the recess scriber against the bottom sheet scribed edge for proper fit, lay the second sheet, roll it, re-roll the entire floor, and clean and dry the seam areas to remove any excess adhesive. If thee seams or small repairs require welding, they’ll have to wait 24 hours for the adhesive to set, groove the seam to two-thirds of the tile depth, and apply the rod at the recommended speed and heat.
In all floor-coating applications, crews first should practice first with a scrap piece of resilient flooring or use a test area for coating procedures first, to ensure that the application achieves the desired effect.
Wood Floors
Surface preparation is the key to producing a good-looking, long lasting finish for wood floors. Workers should sand new floors one to three weeks after installation to allow time for settling.
They can refinish old floors before they become too badly stained or scratched in order to minimize the amount of surface removed. They’ll need to remove carpets, furniture and drapes and sweep the floor clean of dirt and grit. The also can remove molding strips using wood wedges against the baseboard to prevent scratching or marking. Replacing affected boards might be the only way to get rid of some deeper stains, such as urine or ink.
Workers can remove scratches, yellowing and other minor surface defects by sanding with a power-drum or belt sander, which brings out the wood’s original color and beauty. An edger gets into places where the drum or belt sander can’t reach. Corners and closets require hand scraping and sanding. Power sanding should start about two-thirds of the way from an end wall at one side of the room, in the direction of the wood grain.
A sander with a drum elevation control lever on the handle provides control so the drum is never lowered when the sander is not moving. Workers should overlap previous sanded floor areas so they sand only 3 inches of new flooring on each pass to create a smooth finish. A sander vacuum bag minimizes dust cleanup.
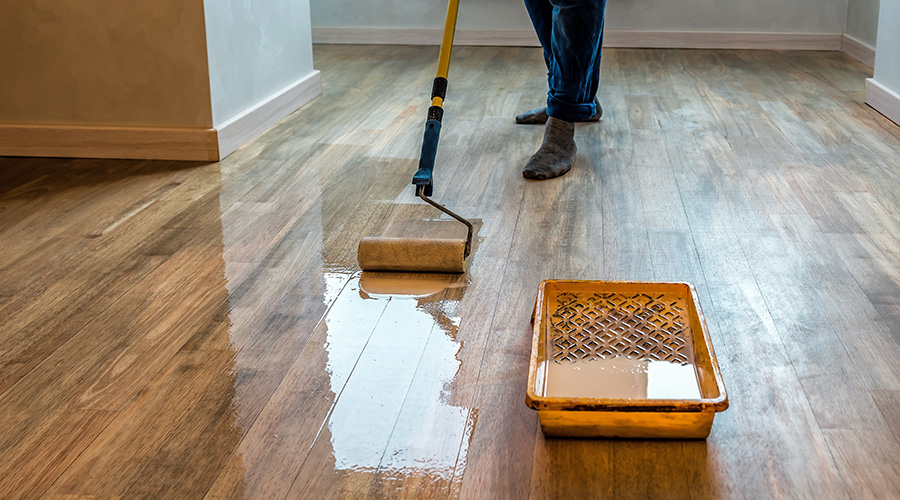
They can address separations between boards or holes by applying a filler compatible with the finish coating, letting it dry, and hand sanding. Next, they can apply a penetrating sealer coat the same day, which soaks into the wood and hardens to seal the new surface. Two sealer coats are recommended with a wax finish, and one with a polyurethane finish. After overnight drying, they can buff the sealer, clean, vacuum and dust.
Polyurethane and water-based urethanes are mainly synthetic resin-plasticizer blends. Water-based urethanes dry faster, but cleaning crews shouldn’t use a steel wool buffer between coats because loose particles will rust and cause discoloration.
Bottom-Line Info
The following organizations offer more information about floor coatings, materials and care:
|
Related Topics: